 Tutorial Tutorial
These instructions assume that you have already successfully completed parts 1 through 5 of the JAS tutorial.
A remote job is one where events are processed on a remote server and JAS works in client/server mode. The data sources used are on a server that is running Java Data Server code. All data analysis takes place there. While histogram bin values or other results of event processing are sent to the client, the data themselves remain on the server. The user can use the client code to visualize and analyze the data summaries without having to send it all over from the server. A remote job for event analysis will read a data set and analyze the events in it.
|
To create a remote job for data analysis you must activate the New Job Wizard by either:
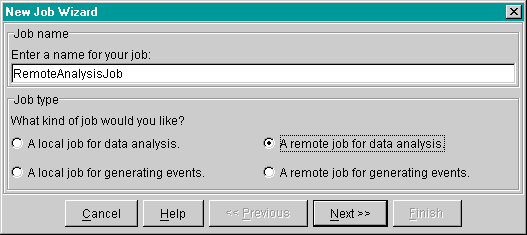
The New Job Wizard, shown below, will appear. Enter the job name as 'RemoteAnalysisJob' and select 'A remote job for data analysis'. Click 'Next'. |
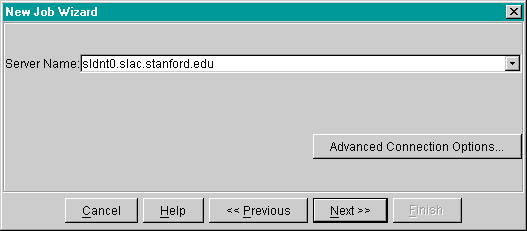
Now the New Job Wizard prompts you for the server that is running the Java Data Server code. That is where the data is and the analysis code will be executed.
| For this tutorial you should use the default server, sldnt0.slac.stanford.edu. Click 'Next'. |
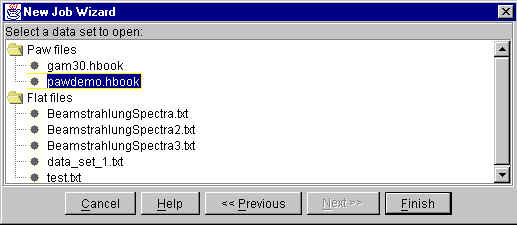
The next page, shown below, will ask you to select the data set on the remote server. They are organized in a tree by the event source type.
| Select the pawdemo.hbook data set from the Paw files folder. Click on 'Finish'. |
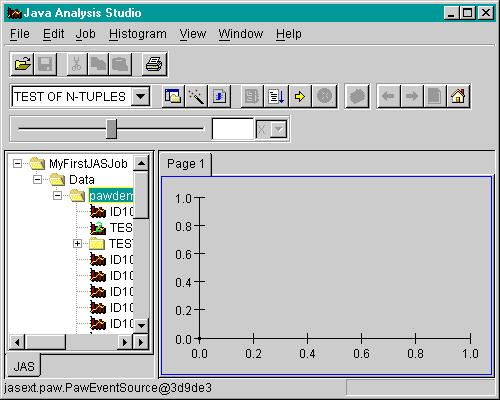
The data set will now appear on the job tree in the main JAS display, as shown below.
You are now ready to analyze the data in your opened job. Follow the instructions as detailed in JAS Tutorial Part 3: Performing Data Analysis. Remember to consider the different variable names used in part 3 as you will be required to slightly modify the instructions .
Now you can compile, load and run the source file as detailed in JAS Tutorial Part 4: Compiling, Loading and Running your Source Code. Again, consider the different variable names used in part 4 as you will be required to slightly modify the instructions .
After running your event generation code you can view the results by following the JAS Tutorial Part 5: Viewing Results. Again, you will have to consider the different variable names used.
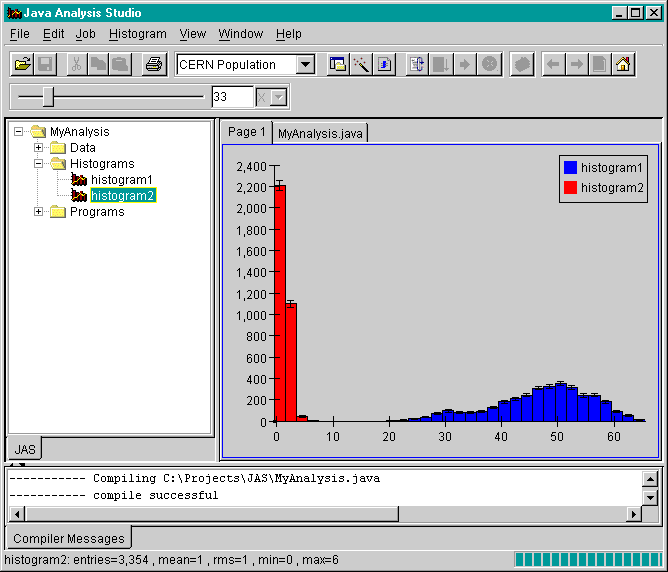
Once you have completed these steps the histogram plot should appear as below.