 Tutorial Tutorial
These instructions assume that you have already successfully completed parts 1 through 5 of the JAS tutorial.
In a local job all events take place on the user's (local) machine. A local job for event generation will use an event generator to create a data set of events.
|
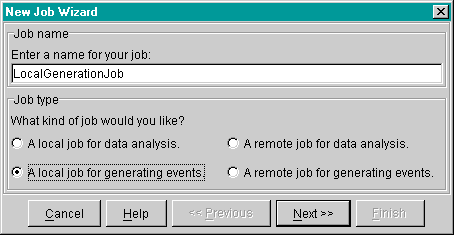
To create a local job for event generation you must activate the New Job Wizard by either:
The New Job Wizard, shown below, will appear. Enter the job name as 'LocalGenerationJob' and select 'A local job for generating events'. Click 'Next'. |
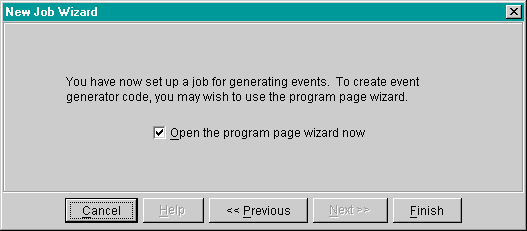
After clicking Next' on the first page of the New Job Wizard, the following setup page will ask you to use the Program Page Wizard to create the event generator code.
| Make sure the check box is selected and press 'Finish'. |
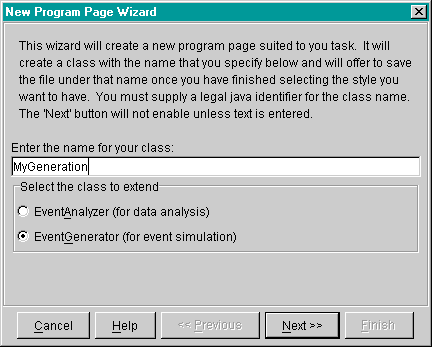
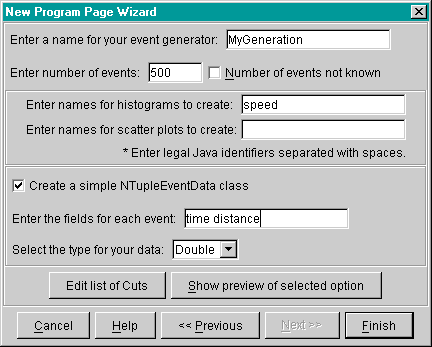
The opening page of the Program Page Wizard, shown below, will appear. The wizard is used to create custom source files suited to your needs while following Java language requirements and JAS specifications for event generators.
| Enter the name 'MyGeneration' for the class the wizard will generate. Below, you must select whether you are creating an event generator or an event analyzer. Select event generator and click on 'Next'. |
Now the program wizard will display the event generation setup page, shown below. To write an event generator in JAS, you must create a Java class that extends the class hep.analysis.EventGenerator, compile it, and load it into the application. As when you performed the data analysis job earlier in the tutorial, the wizard will help by creating most of the generator source file. A user does not have to use the wizard, but if you don't you should be aware of the guidelines for event generators that the wizard normally takes care of for you. The following list provides a brief description of each field in the wizard's event generator setup page and the recommended entries for this tutorial:
| Keep the generator class name as 'MyGenerator'. |
| Set the number of events to 500. |
| Enter the histogram name speed. |
| For this tutorial indicate that you want the wizard to create an EventData class with two fields, time and distance. Set the data type to double-precision data. |
| Click on 'Finish' when all of the setup is complete. When you click on 'Finish', the wizard will offer to save the file. It is a good idea to save it now because you cannot compile it until it is saved. Save it as 'MyGeneration.java'. |
Your source file, 'MyGeneration.java', will be created and displayed on a display page. Because you have made use of all of the Event Generator wizard options, all you need to do is change the generateEvent() method to include the simulation you want. Once that is complete, you will have a syntactically correct file that can be compiled and loaded. Below is the generateEvent() method the wizard has provided:
|
All you need to do is complete the calculations where comments indicate.
|
For this
tutorial change the method definition to what is below, and save your changes by clicking the save
button |
|
Now you can compile, load and run the source file as detailed in JAS Tutorial Part 4: Compiling, Loading and Running your Source Code. Remember to consider the different variable names used in part 4 as you will be required to slightly modify the instructions .
After running your event generation code you can view the results by following the JAS Tutorial Part 5: Viewing Results. Again, you will have to consider the different variable names used.
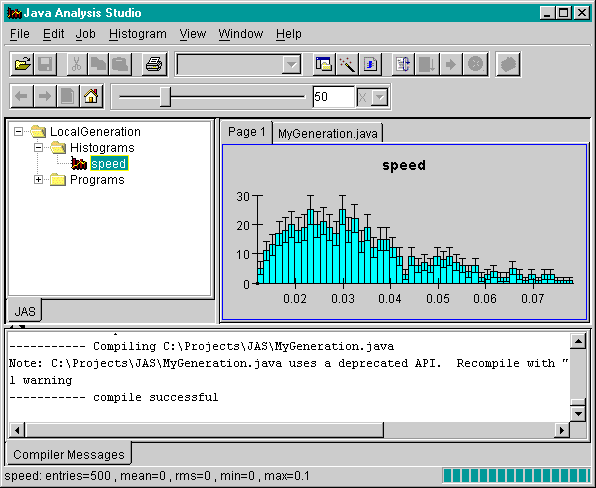
Once you have completed these steps the histogram plot should appear as below.