The latest version of Microsoft's C++ development environment (.Net) offers a compiler which is more standards-compliant and an IDE which is more convenient for the users. However, the graphical user interface has changed, which can be disconcerting for users used to the older versions. For new users, especially those accustomed to issuing command-line instructions to compile, link and run applications, it can be difficult to figure out how to get started. This page intends to be an introduction for new users on how to start building libraries and basic console applications.
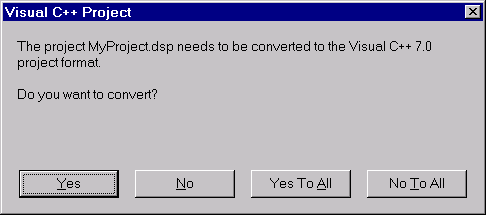
For users intending to continue development on legacy applications, .Net can automatically update your existing Workspaces and Projects. After installing .Net, simply double-click on your project or workspace icon and the following screen will appear:
Clicking on either Yes or Yes to All will create new Projects and
Solutions (the new name for Workspaces). Projects now use the
.vcproj
extension and are XML files. Solution files use the .sln file extension and
remain plain text, albeit in a different format from Workspace files.
The new IDE offers many new and improved features. However, before exploring them we need to know how to create a basic C++ Project. In all the cases to be considered here, we will be dealing with simple console applications and static or dynamic libraries (DLL's).
We begin by opening MSVC++.Net and creating a new Project. Type Ctrl+Shift+N, or
select File->New->Project...
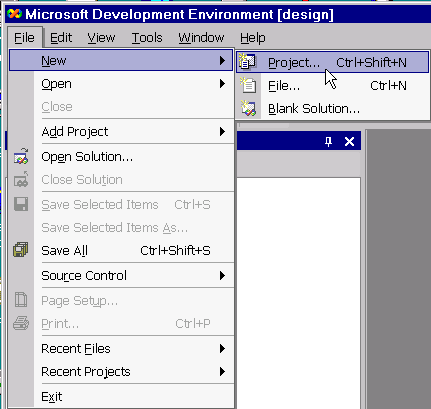
This brings up the following screen:
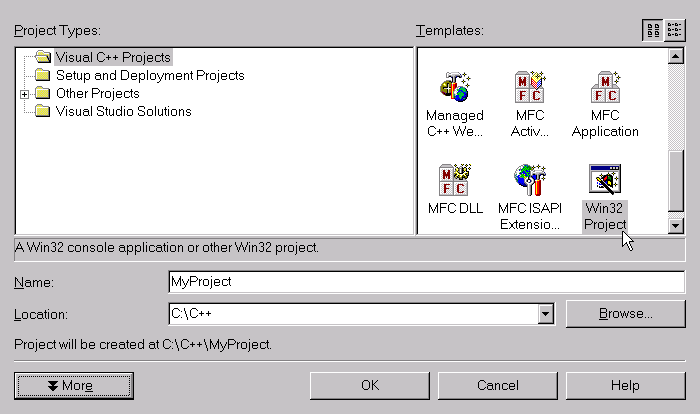
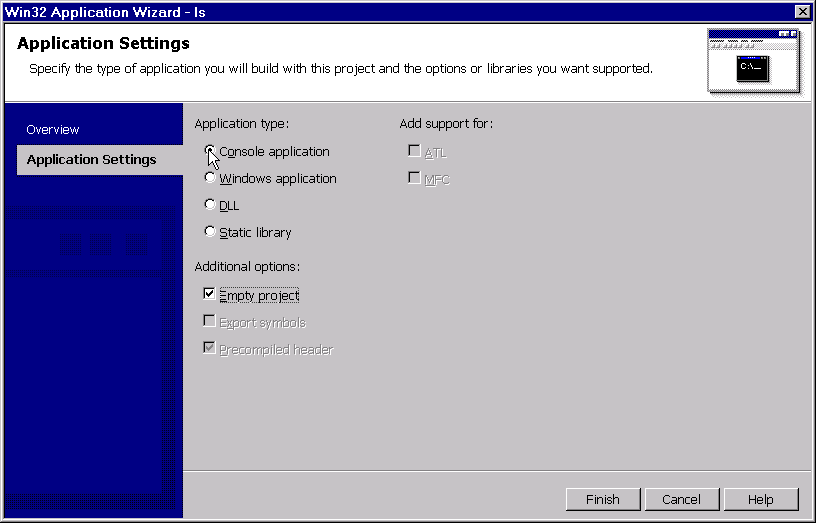
Fill in the name and location for the Project. We will be exclusively building Win32 Projects, which brings up the following wizard:
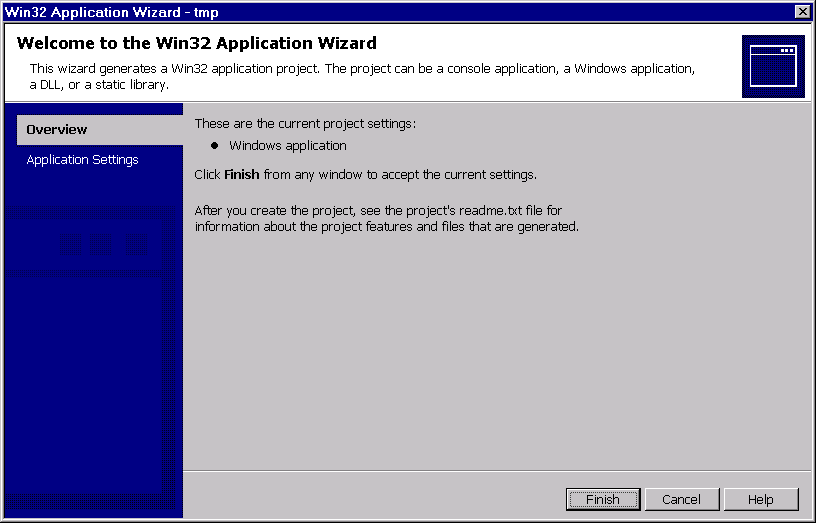
Selecting Application Settings brings up the following screen, where we will select from Console Application, DLL, or Static Library. Select Empty Project, as we will be adding all the files we need.
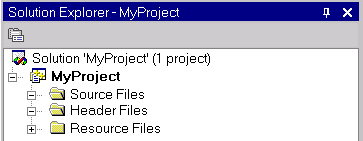
Clicking Finish brings us back to the Solution Explorer with a familiar looking Project tree.
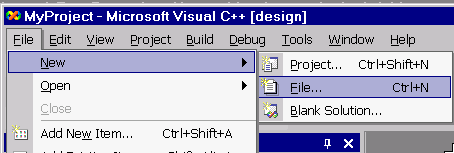
New files can be created by typing Ctrl+N or selecting
File->New->File...
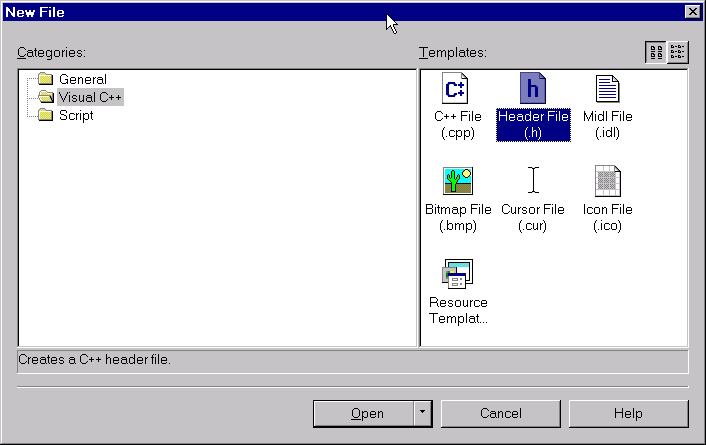
This brings up the following selection screen where we will be using either
C++ implementation (.cpp) or header files (.hpp)
After editing use either Save Header As... or Save Source As... to your desired file location.
To add existing items to the Project select the Add Existing Item... option, which brings up a navigation panel to allow you to go to the directory where you have saved your files and select them.
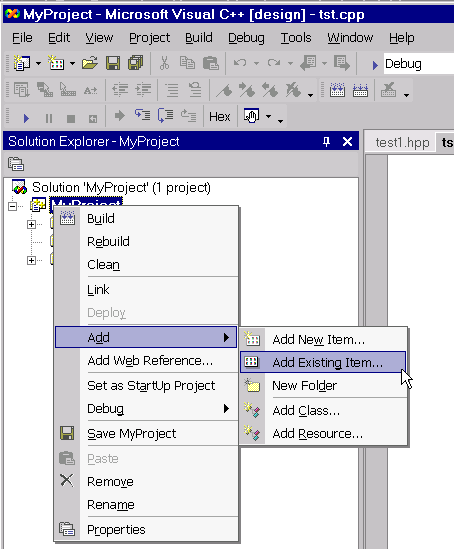
The preceding steps can be accomplished in one by adding a new item directly to the Project, via File-> Add New Item... or Ctrl+Shift+A :

Fill in the name and location (or browse...) and you're ready to start editing.
I don't know whether this is an issue with this version of the ide, but previous versions did not recognize .cc and .hh file extensions for C++ implementation and header files. If this is a problem, see the instructions from Microsoft for correcting this.
For most applications, the default compiler settings will suffice. However, we will need to specify locations or search paths for files on which this project or code depends. Right-clicking on the Project allows us to specify these settings (now called Properties):
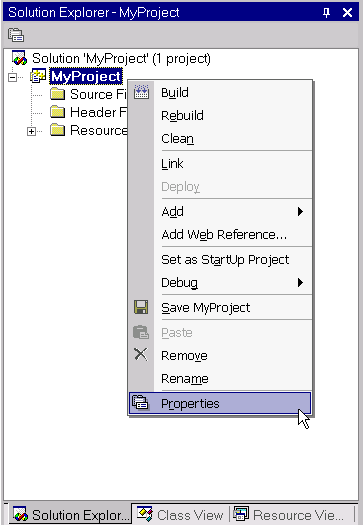
The Project Properties GUI has changed and although it makes setting many of the variable definitions more convenient, it does take a while to find the new location for some of the standard settings. Here is the General Properties pane:

To compile anything more than the simplest C++ code, we will need to define
the location for additional headers to be included. This used to be on the C/C++
tab under Preprocessor. It is now found on C/C++ General pane. Clicking on
Additional Include Directories now brings up a brief description at
the bottom of the pane. Expanding the ellipses button (![]() )
brings up a screen which allows you to graphically manage the necessary include
directories. Clicking on the New Line button (
)
brings up a screen which allows you to graphically manage the necessary include
directories. Clicking on the New Line button (![]() )
brings up a directory
browser window which allows you to navigate to the target directory. You can
also delete (
)
brings up a directory
browser window which allows you to navigate to the target directory. You can
also delete (![]() )or
change the search order (
)or
change the search order (![]() )
for the directories using the other control buttons.
)
for the directories using the other control buttons.

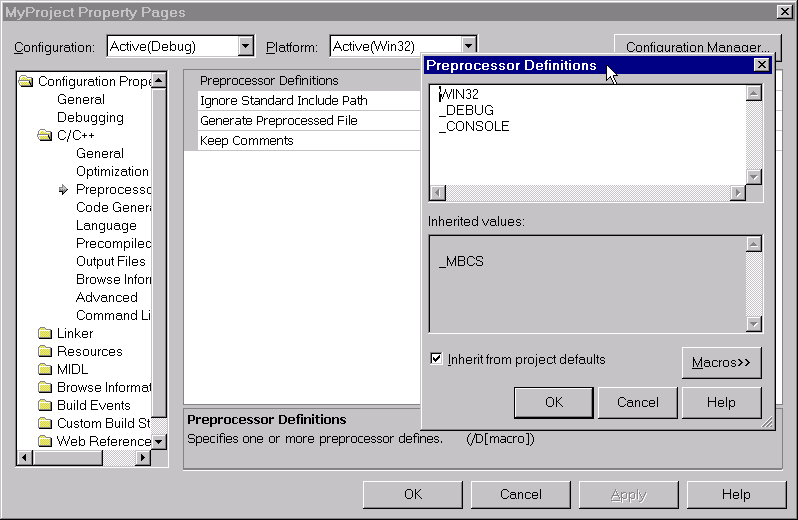
One often controls conditional compilation with preprocessor definitions. These are still found under Preprocessor, but are now much more convenient to set and review since they are listed in a larger, vertical scroll pane. You can also inherit from project defaults, sparing you the need to redefine them for many projects with similar characteristics.
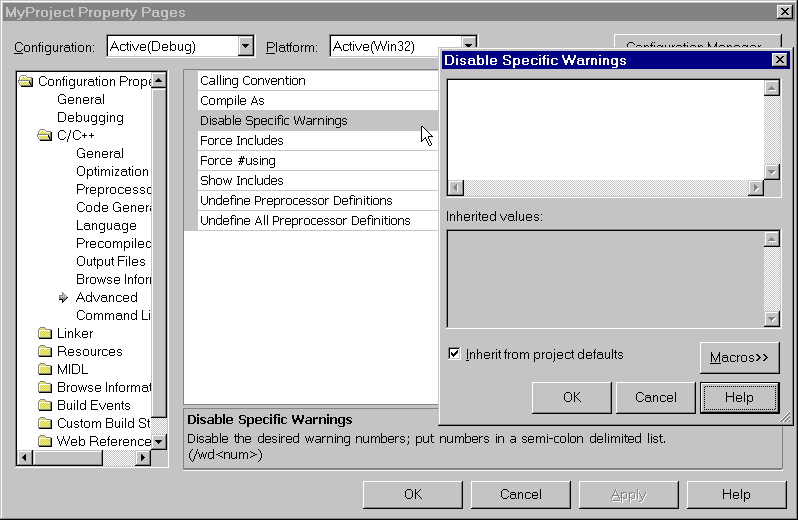
One nice new feature allows you to disable specific warnings without having
to insert statements such as #pragma warning(2:4032)into your code.
This is accessed from the Advanced panel.
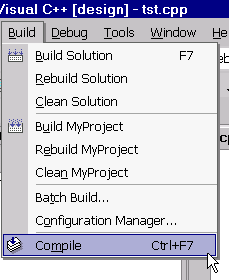
When a C++ implementation file has scope (i.e. you have selected it in the Solution
Explorer or it is the active file in the editor), you can compile the file
by typing Ctrl+F7 or by selecting Build->Compile
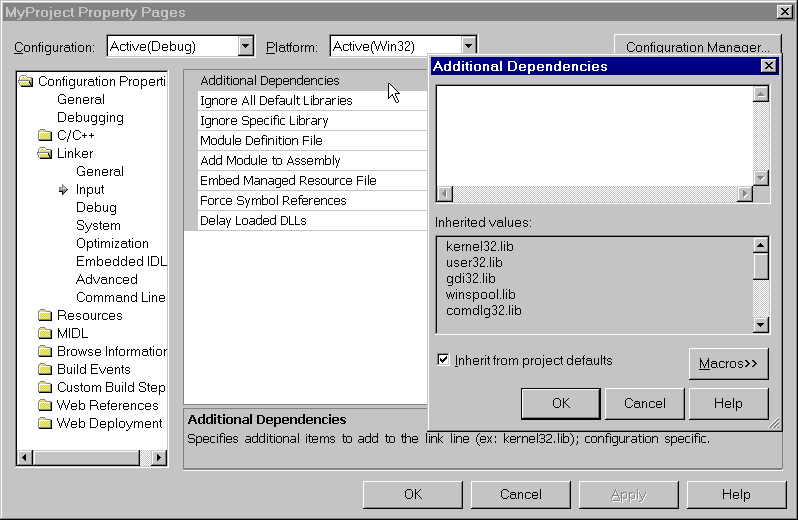
Libraries needed for linking are specified on the Linker pane, under Additional Dependencies. Again, the larger, vertically scrolling pane makes this process much easier than in earlier versions of the IDE.
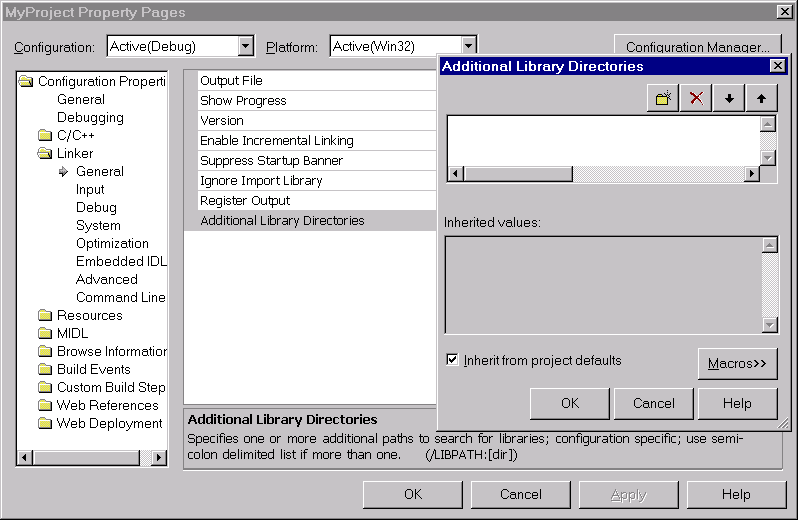
The search path for these additional libraries is set from the General pane
by selecting Additional Library Directories. Expanding the ellipses button (![]() )
brings up a screen which allows you to graphically manage your include
directories. Clicking on the New Line button (
)
brings up a screen which allows you to graphically manage your include
directories. Clicking on the New Line button (![]() )
brings up a directory
browser window which allows you to navigate to the directory that you
need. You can also delete (
)
brings up a directory
browser window which allows you to navigate to the directory that you
need. You can also delete (![]() )or
change the search order (
)or
change the search order (![]() )
for the directories using the other control buttons.
)
for the directories using the other control buttons.
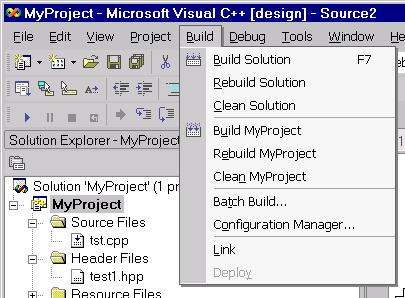
To create the executable or library you need to build the project by selecting Build->Build <ProjectName>. If your Solution contains multiple Projects, building the solution (F7) will first build any modified Projects on which your active Project depends, then your Project.
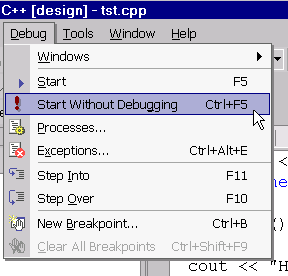
If you have built an application, you can run the executable by either typing
Ctrl+F5 or selecting Debug->Start Without Debugging
You should now be able to create a project, specify the most commonly used settings, and create basic C++ applications and libraries.
Of course the power of the IDE really becomes useful when it comes time to debug the application (you'll notice that the default for running an application is in debug mode!). We'll introduce the basics of debugging in our next session. Stay tuned.
Microsoft provides an enormous amount of documentation on the web at http://msdn.microsoft.com/library/en-us/vcedit/html/vcorivisualcmainnode.asp.
If you have any comments or suggestions, especially contributions to improve this set of instructions, please contact me.